Well, we still have a couple years to go here. But the little guy's soccer mates and cousin have started losing some teeth. I had a few sketches worked up. Some were in the shape of a tooth. Others had ribbon to hang the pillow from a doorknob. I settled on a tooth fairy applique with varying themes. I like this best because of the vast number of options. I already have a list at least 20 long of themes. The 3 I have made so far are sans ribbon. I may design them for a hanger to be optional. Still thinking this one over.
The very first pillow was hijacked by my youngest. I had a feeling. That is why I started with the tooth driving a car...he just loves toy cars.

The back of the pillow has a "tooth face" pocket for the tooth/money and a stop sign. Get it? For the tooth fairy to stop. I think I will stick to a small pocket that follows the theme on the front of each pillow for now on.

These two are almost done. They just need the pocket on the back & the front sewn to the back. And to be stuffed of course :) Oh...and ironed.
This is the pink tooth fairy, um, well, fairy. Her magic wand looks more like a tail...I think I need to give her arms. I love the tulle tutu and wings though. The pocket will most likely be a sparkle or a butterfly.

This space tooth is my fave of the 3. I couldn't resist adding the "42". Most people won't get it, but I couldn't do without :) The pocket on the back will be either a satellite, moon or another planet. Still deciding.

Oh...and they do have faces. They were not on at the time of the pics. I stuck with buttons for eyes and hand embroidered mouths. I may applique &/or embroider all of it in the future. Although, if a child is old enough to lose a tooth, they are most likely old enough to not go eating buttons off of pillows. But you never know.
 I showed off the front before it was finished earlier, but at the time I was not sure about the back. I went with a stump and button caterpillar.

 The white cat faced one in the upper right...that is going to be my son's vampy cat...which he has patiently (mostly) been waiting for. Vampy cat is a small teddy bear from the Buffy comics...so cute...not so sweet, but cute :)
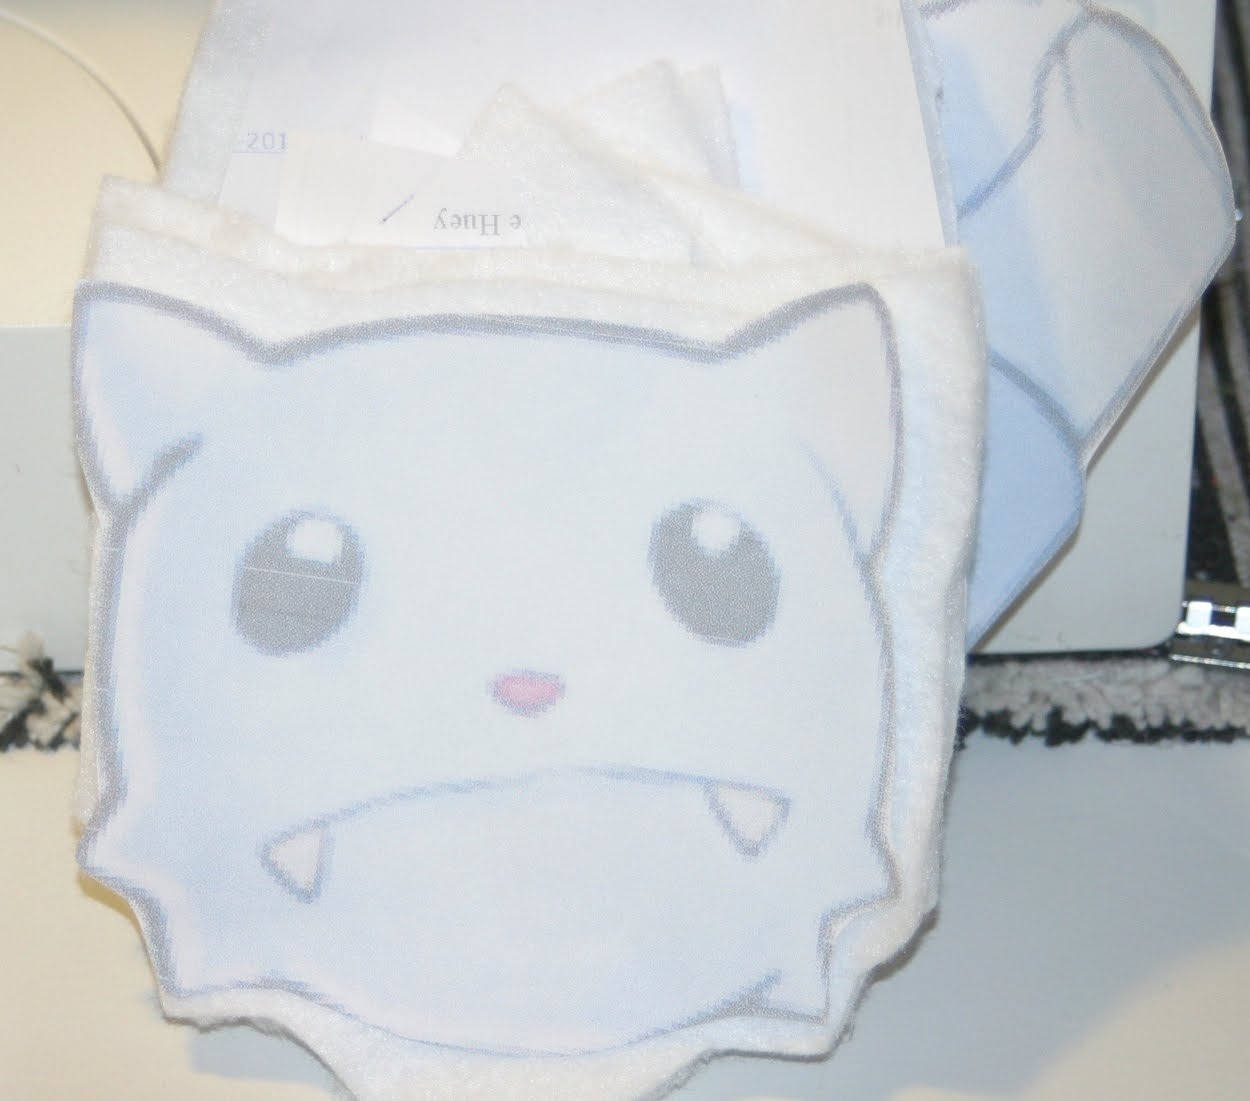

 And the back sides...
 I am assuming the tooth fairy leaves something other than a quarter nowadays. So the pockets are sized to fit a folded up dollar bill. Do people...um, I mean tooth fairies...leave more than that?
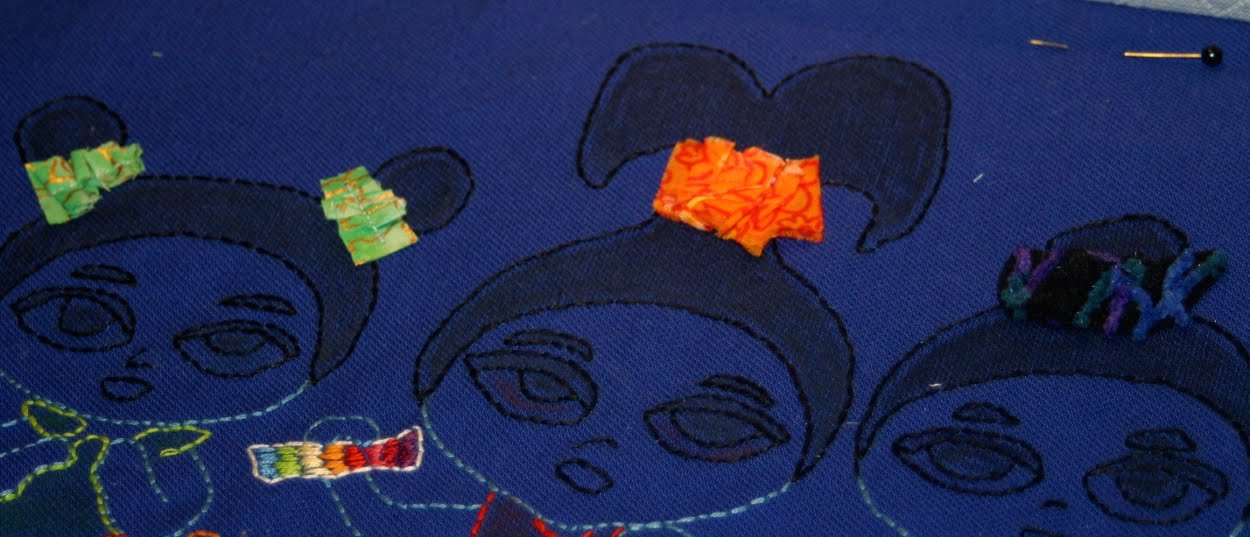 This is the front of the pillow. I used a blue diamond Matelasse fabric to frame the embroidered area. The girl's faces still seem a bit dark. I am debating on whether to add some paint to their eyes and dresses. What do you think? Too much? I'd hate to take it one step too far when there is no way to undo.
 One last pondering I have...should I pillowize my embroidery pieces or mount them in finished off hoops...hmmm...maybe I'll go halfsies.
 The back of the pillow has a "tooth face" pocket for the tooth/money and a stop sign. Get it? For the tooth fairy to stop. I think I will stick to a small pocket that follows the theme on the front of each pillow for now on.
 These two are almost done. They just need the pocket on the back & the front sewn to the back. And to be stuffed of course :) Oh...and ironed.
 This space tooth is my fave of the 3. I couldn't resist adding the "42". Most people won't get it, but I couldn't do without :) The pocket on the back will be either a satellite, moon or another planet. Still deciding.
 And this came next...these were on the majority of my bags so far:
 And this is the newest version:
 And yes, I am sure it will change again someday...that is just the way I am :)
 Do you see it? The handle portion is like the waist & the exterior pleated part looks skirty. The lining, well, pretend it's not there. Now I want to make some clothes!
 I am also doing my first blog party with this post over on Everything Etsy.


 The "corners" where the side seams are could use some smoothing out...maybe another time I will sit down & work on it...but not now. Now I making other changes in the shop & working on a couple bridal party orders. And don't forget to check out all the styles I just put into my clearance section :D *hint hint*
 Yes, another Mutant Enemy has made it's way to a messenger bag. This one is hand embroidered brown on tan twill to top off the olive canvas bag. The bag itself is a bit more tweaked than normal. Under the front flap is an open pocket with a flap. On that pocket is a small zip pocket for, well, whatever is tiny & tends to get lost. Hubby has one on his Watchmen bag & it holds my biz cards...isn't he sweet? It could hold keys to a bike lock, or small set of house keys. Moving on....inside. There is a dividing wall at the front of the bag. And the back wall has a large zippered pocket. There is also a clip on a tether on the side wall. Another good spot for keys...or the little zip pouch I made for it :)
 I hope my customer enjoys it...I know I had fun making it!


